Enabling Database Access for a User
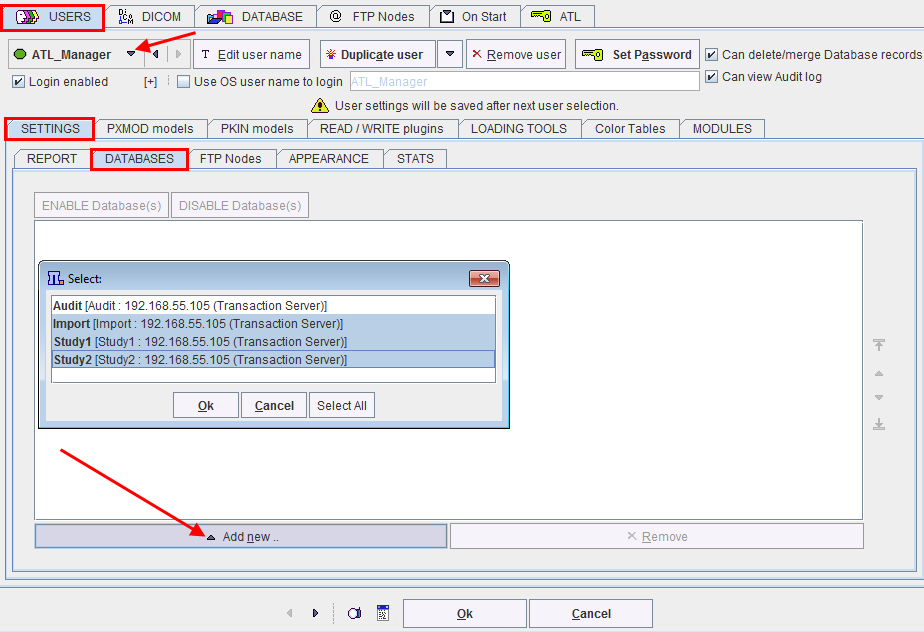
The administrator has to explicitly configure all databases to which a PMOD user has access. This is done on the USERS panel:


For the user ATL1 enable the Study1 and Study2 databases, and for ATL2 only Study2.
Database Access List
For each database, a user access list is maintained. This list is synchronized with the configuration described above, but provides some more detail.
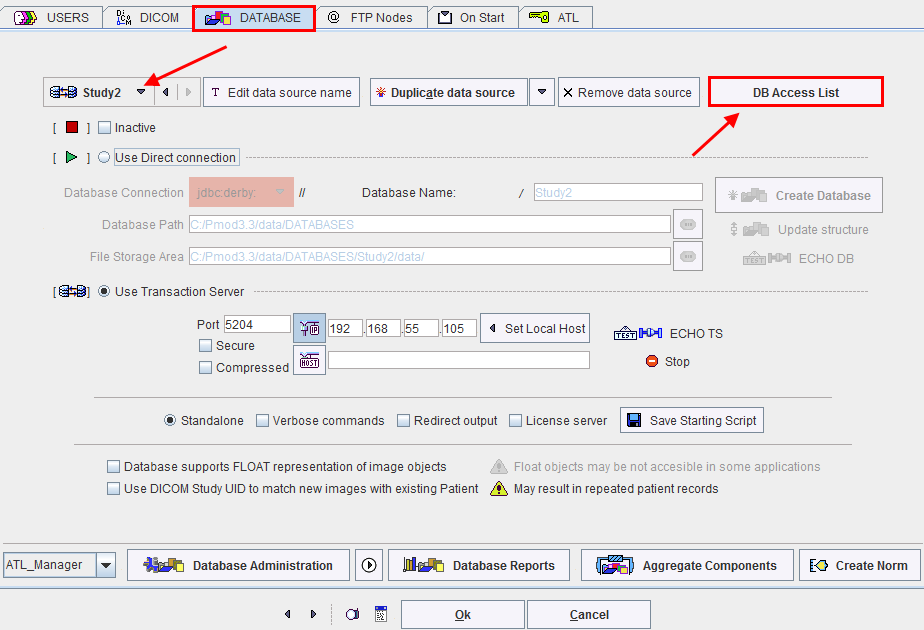
To see and edit the database access lists select the top DATABASE tab of the configuration then the DB Access List button near the data source creation/removal. It shows a dialog window as illustrated below.

The DB Access UID contains the name of the PMOD user. The Computer column shows the systems from which the user can access the database. If the "*" is shown, user access from all client systems are allowed. It can be restricted by replacing * by a computer host name. A value of 0 in the Enabled column indicates that the user has no database access, whereas 1 indicates enabled access. The Description is a convenience field which can be edited by the administrator for commenting purposes. First login and Last login give some information about the activity of the user.

The Edit button serves for editing the selected access list entry as illustrated below. For instance, by removing the Enabled check, the user can be blocked from the selected database.