![]()
![]()
![]()
![]()
|
|
|
|
|
The PSAMPLE Correction module is the dedicated tool for the correction and calibration of the measurement data. The correction module can be activated selecting the Correction button  in the main PMOD Toolbox. The interface is organized in two main pages with similar layout: the Correction page and the Calibration Factor page.
The Correction window allows performing all the steps necessary for the correction and calibration of the measurement data when the calibration factor is known.
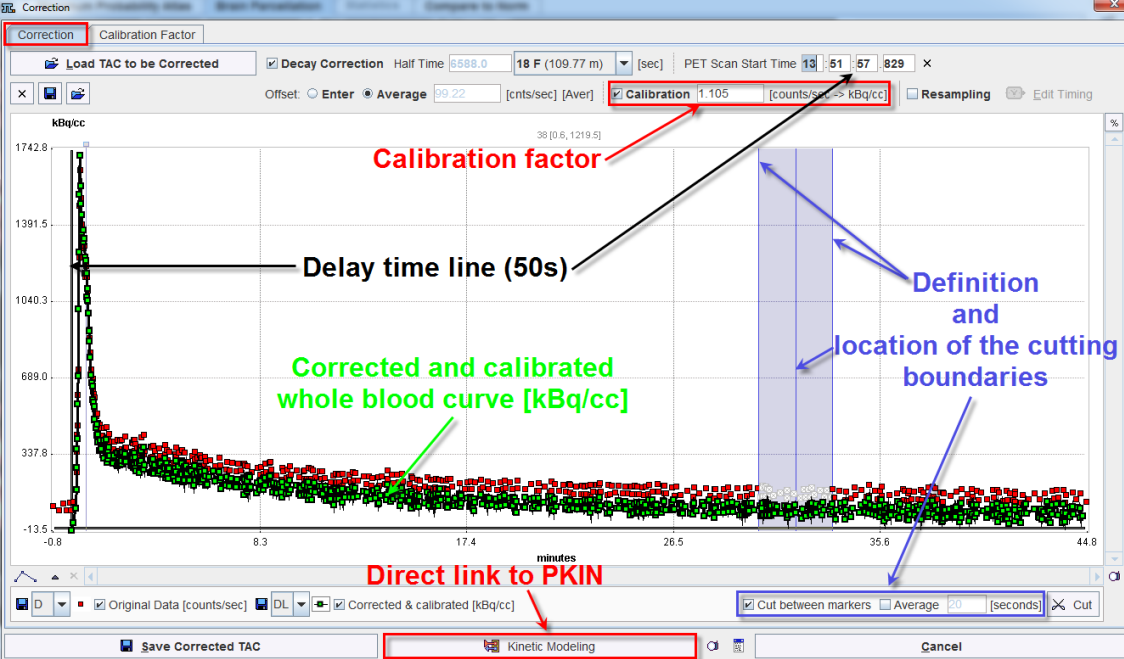
The settings available on the Correction page are as follows:
|
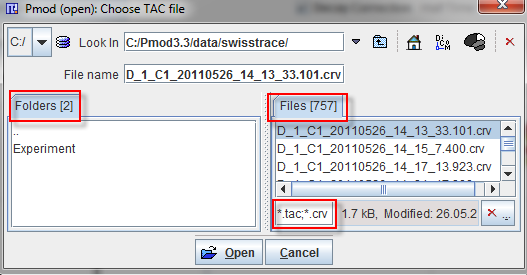
Allows loading and correcting whole blood data located on the file system. The button activation opens a dialog window. In the upper part the current path is indicated. The program automatically points to the directory of the last successful loading operation. It has elements for changing the directory: the navigation buttons in the Folder section (.. indicating one level up). All files suitable for loading (having the right suffix, such as *.tac, *crv) in the search directory are listed in the Files section. The Open button starts loading the selected file, Cancel quits the operation, and Delete erases the file from the disk. |
|
The button is located under the Load TAC to Be Corrected button. Its activation closes the displayed TAC. Subsequently, the graphic area becomes empty. |
|
Allows saving the correction parameters (e.g. the calibration factor) determined in the Calibration Factor page. The saved file receives a .corrPars suffix and can be visualized in Excel or a text editor (e.g. Notepad). |
|
Allows loading correction parameters already available on the file system. The calibration factor is read from the file and the dedicated field is updated accordingly. |
|
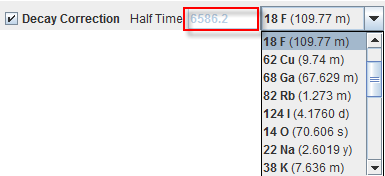
Checkbox enabled: allows the selection of the radio isotope used in the experiment. Accordingly, the activity measurements are corrected for the decay. The isotope half-life is displayed in seconds in the Half Time field. |
|
Displays the time when the PET scan was started. The text box allows the manual adjustment of start time of the PET scan. Consequently, the "X" symbol becomes active, allowing to reset the time to the original file start time. In case no TAC was loaded the time setting area is gray and a message is displayed: Scan Time Not Available |
Offset
|
Performs the subtraction of the background activity [counts/sec] from the measured TAC. Enter radio button ON allows the user to interactively enter the known offset value to be subtracted from the raw data [cnts/sec] Average radio button ON subtracts the first measured value from the TAC when PET and twilite acquisition started simultaneously. Differently, when the PET Scan Start Time must be adjusted the value to be subtracted is calculated as the average value over the delay time ([Aver]). |
|
If the calibration checkbox is ON the correction for the calibration factor is applied to the curve (e.g. whole blood). |
|
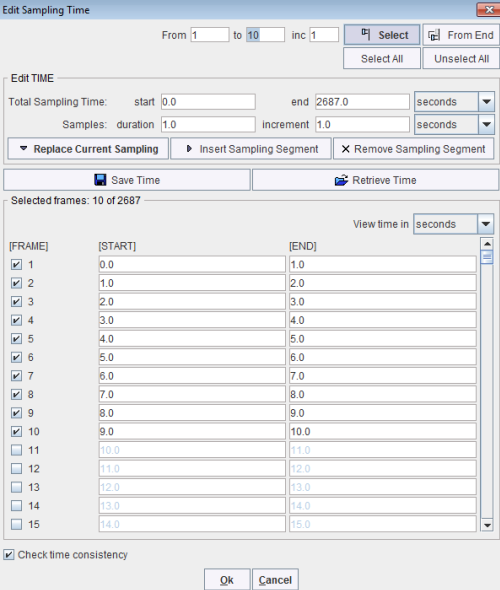
In case the Resampling checkbox is enabled the time can be inspected and the definition overwritten activating the Edit Timing button. Select/From End: Allows selecting a subset of frames, from the first or from the last frame: From frame-x to frame-y with an increase step Inc. Select All/Unselect All: Allows selecting or unselecting all the available frames by simply choosing the dedicated buttons. Replace Current Sampling: Allows defining a different sampling time of the experiment in the Edit Time pane (start, end text boxes) with the same integration time (duration, increment).The number of frames can differ from the initial ones. Insert Sampling Segment: Allows the insertion of new frames within the existing ones or at the end of the experiment. Consequently, the frames number changes. It is a useful feature when the purpose is curve extrapolation. Remove Sampling Segment: Allows removing of sampling times based on the segment definition (start, end). Optionally, the settings in the Edit Time pane can be displayed in different time units: miliseconds, seconds, minutes, hours. This can be easily achieved using the selection list available for both Total Sampling Time and Samples. The Save Time/Retrieve Time buttons allow saving/retrieving the timing of the dynamic frames to/from a file. |
|
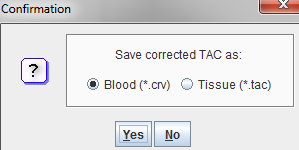
Allows saving the corrected and calibrated curve. A confirmation window pops up allowing to save the corrected TAC either as a blood curve, .*crv, or as a tissue, .*tac. The saving procedure continues upon activation of the Yes button. Alternatively, it is possible to abort the saving selecting the No button. |
|
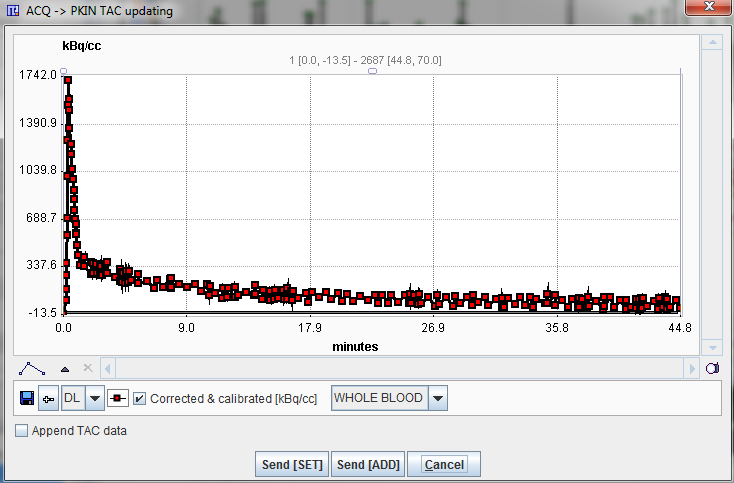
Allows sending directly the corrected and calibrated curve to the kinetic module. Upon activation, a dialog window appears which allows defining the proper type of the calculated TAC (WHOLE BLOOD = spillover curve, PLASMA = input curve, tissue TAC (Region). The Send[SET] button transfers the TAC data to the currently selected tab in the PKIN tool. If the Append TAC Data box is checked, the curves are appended as new curves to the data existing on the PKIN tab, otherwise the data is over-written. The Send[ADD] first creates a new tab in PKIN, to which the data is added. If PKIN is not running, the tool is first started and the data added. Cancel will abort any action. The +- button in the curve controls allows for simple operations such as curve scaling before sending the data to PKIN. |
|
The selection of this button closes the PSAMPLE Correction module. |
|
Buttons dedicated for problem reporting. The capture button |
|
Cut between markers: If enabled, allows defining and positioning of the cutting boundaries in the acquired raw data. A blue area appears in the graphic window. The area is characterized by a left and a right vertical lines and a middle line. The edges lines allow adjusting the left and right boundaries while the middle line facilitates the positioning of the cutting range. The adjustment and position are performed by simply dragging with the left mouse button the lines in left or right direction. Cut: The activation of this button discards the original raw measurements while replacing them with linearly interpolated values between the start and the end point of the cutting range. The corrected and calibrated whole blood values, corresponding to the cutting range, will be adjusted accordingly. Optionally, the interpolation algorithm can consider raw measurement values acquired for a time interval before and after the defined points of the cutting range. This can be easily achieved enabling the Average checkbox and defining the time interval in [seconds] in the dedicated textbox. |
Note: The correction and calibration of the measurement data can also be achieved starting the correction from the acquisition panel. The difference is that the data need not be loaded: upon the activation of the Corrections button the data are automatically transfered to the correction module.


 creates a capture of the entire screen (not only the PMOD window) and adds it to a buffer of up to 20 captures. The console button
  opens the Console dialog window.