The data acquisition is performed with the dedicated PMOD PSAMPLE tool for acquisition. The module is started activating the corresponding button  in the PMOD Toolbox.
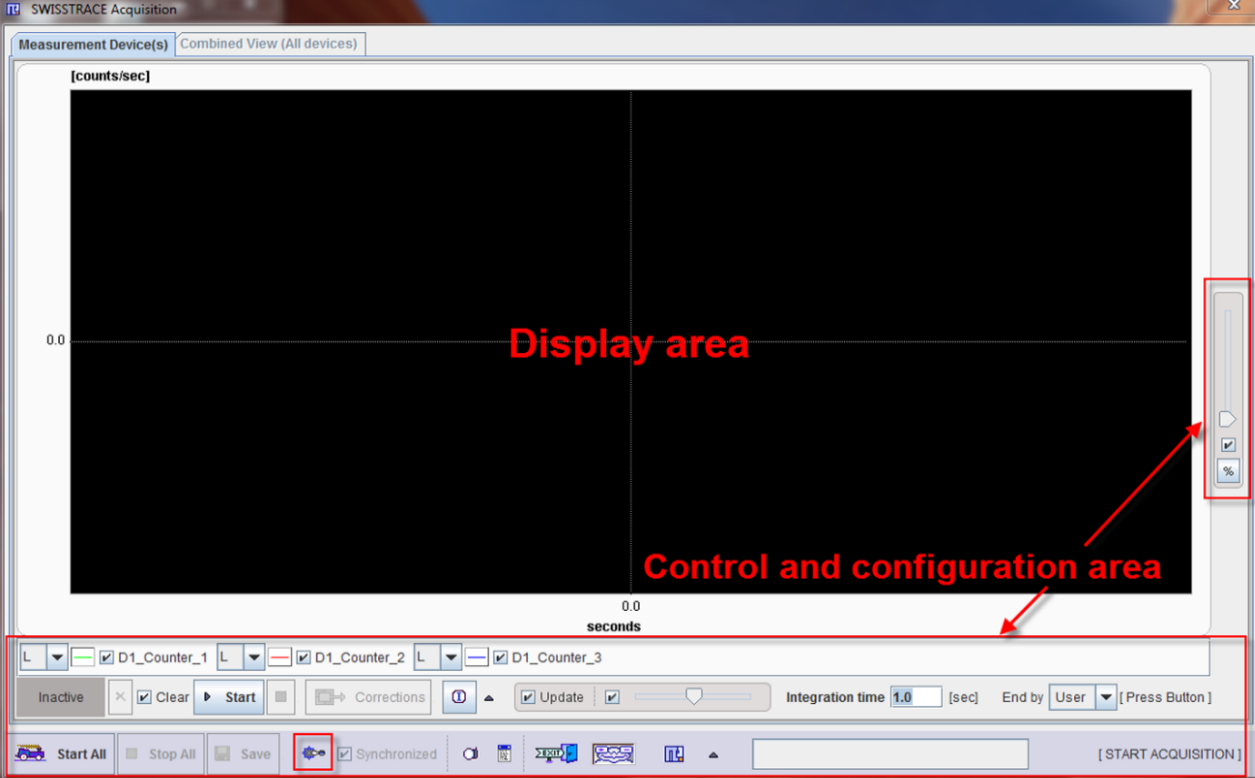
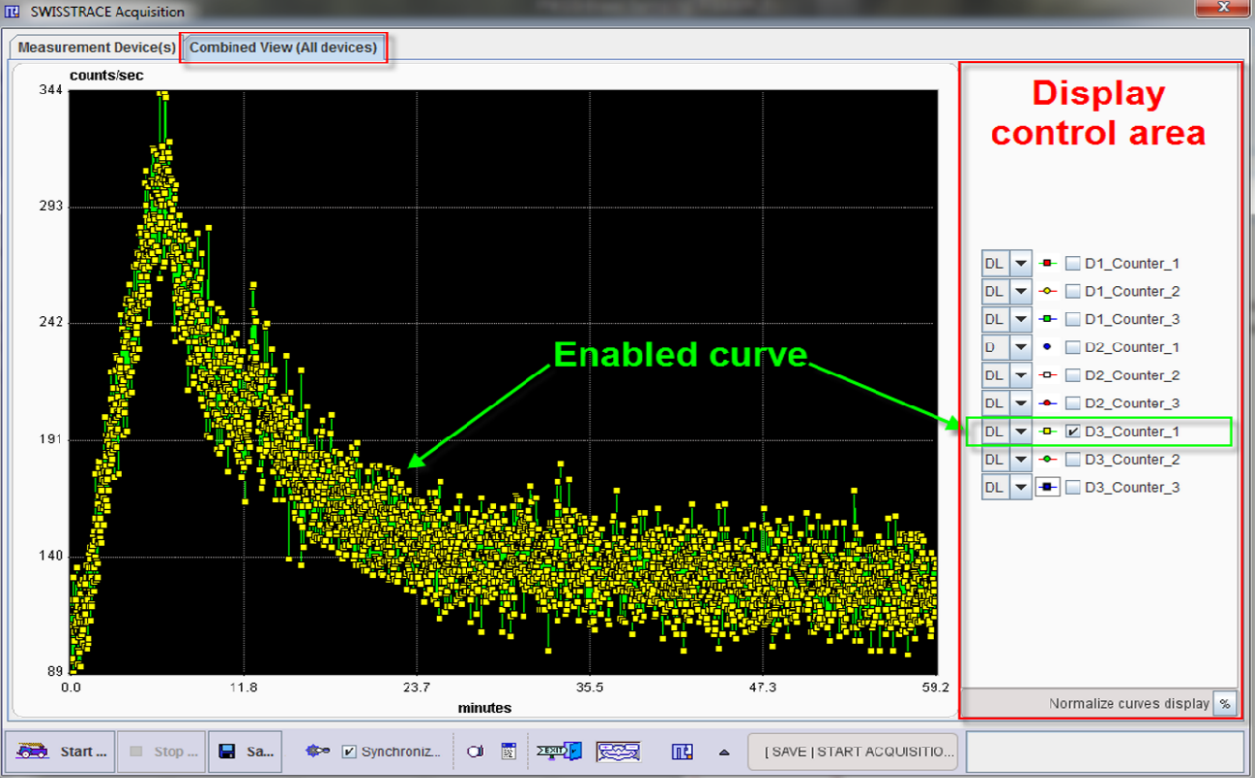
The acquisition interface is organized in two panels as shown below: the Measurement Device(s) page and Combined View (All devices) page.
The Measurements Device(s) page consists in a wide display area and a configuration and control area. The measurement data are displayed as time activity curves (TAC) in counts/sec over time.

The various facilities buttons are summarized in the table below:
|
Configuration button: allows the configuration of up to 3 devices. |
|
Normalization: displays all curves normalized to 1 |
|
Autoscale: if ON automatically adjusts the curves range on the display, on both X and Y axis |
|
Update checkbox: if enabled, automatically updates the display during the acquisition. |
|
Corrections: link button that allows sending directly the acquired curve(s) to the PSAMPLE Correction tool. |
|
PMOD Icon: activate the PMOD Main Toolbox from where each PMOD module can be started. |
|
Clear: is the button dedicated for the buffer cleaning. |
|
Clear checkbox: if enabled, clear the buffer on start. In particular, upon the re-start of an experiment the acquisition will overwrite the existing measurements. Contrary, if disabled, the acquisition will continue from the moment the experiment was stopped. |
|
Capture: creates a capture of the entire screen and adds it to a buffer up to 20 captures. |
|
Console: opens the console dialog window. |
|
The End By supports two setting options:
|
|
Device Info: displays the set up configuration for the device; Hide/Show Controls: when shown allows enabling/disabling the channels signal to be displayed. Define/Save Protocol: is the dedicated selection for the definition of the acquisition protocol. Load Protocol: a protocol previously saved can be retrieved and applied to a new acquisition. |
|
Start button: upon activation starts the acquisition for the configured device. The Start All allows starting simultaneously the acquisition in case multiple devices are configured. |
|
Stop button: if selected the acquisition is stopped. The Stop All button allows ending simultaneously the acquisition for multiple devices. |
The Combined View (All devices) page has similar layout with the first panel. This page is not accessible if only one device (e.g. Twilite) is used and configured. Differently, when multiple devices are configured the window becomes active. Thus, at the end of the acquisition, the results can be easily inspected. The shapes of different dynamic range can be compared normalizing each curve to its own maximum. This can be easily achieved upon activation of the Normalize curves display button  , located on the bottom line in the display control area. In the graphic area only the curves enabled for display are shown.
